Category Archives: Rural Life in Mendota

Daily adventures in a rural farming community.

Natural Christmas Holiday Centerpiece

A few years ago, I was involved in planning a get together at a place call “The Banq” in Kingsport, Tennessee.   We had a very tight budget but wanted to do something nice, and the very talented folks at Rainbow Florist helped me make centerpieces for the tables.    I’m going to share some of what I learned.

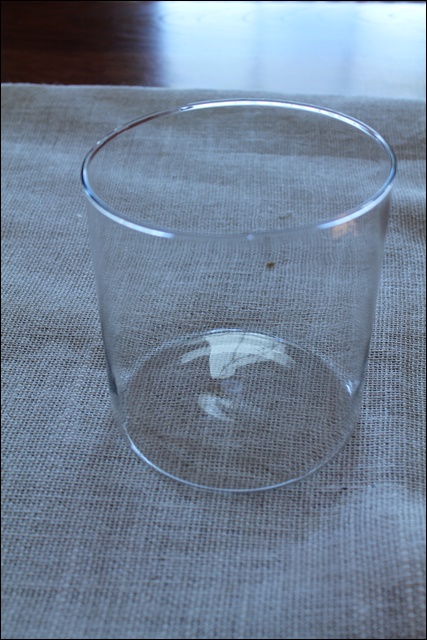
It starts with a glass bowl, glass cylinder or even a Mason jar.   I have a small one that I purchased a few years ago.  This one was about $8 but I used a coupon and got it a little cheaper.

clear vase

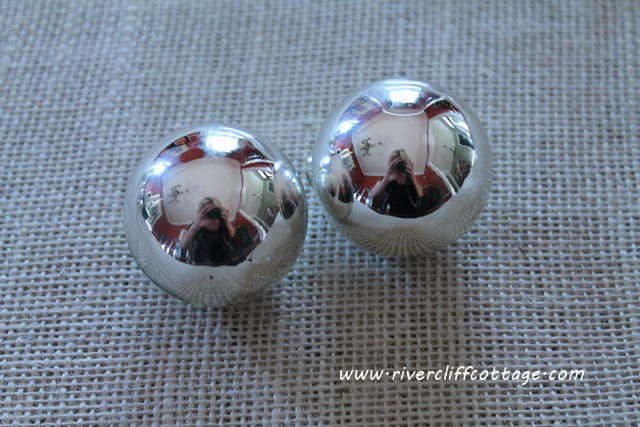
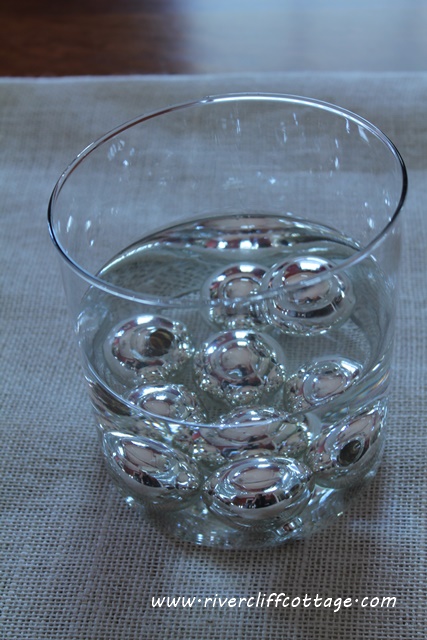
Next up are a few shiny balls. I bought a dozen of these at the Dollar Tree for $1.

Shiny Balls

Fill your container with water and fill each of your shiny balls with water so they’ll sink to the bottom.

Shiny Balls Sinking

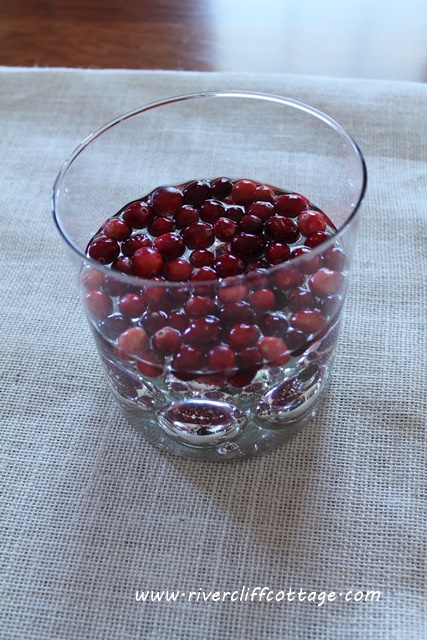
Now, it’s time to add a bit of color. I poured in about a cup of cranberries.

Cranberries in the Vase

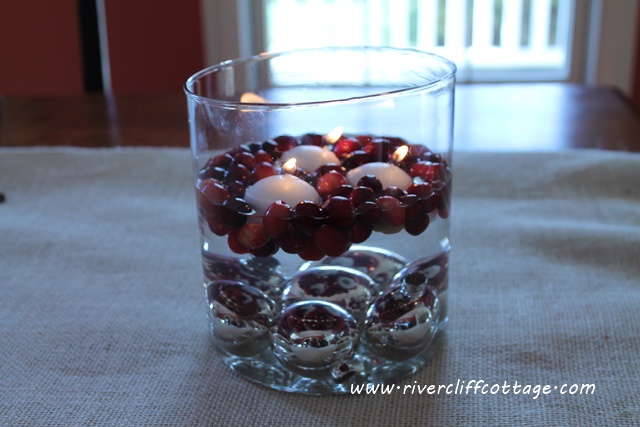
Add a few floating candles. I would have preferred to use one larger floating candle but I only had the small ones, so I used three. For some reason, it’s more pleasing to the eye  to see an odd number. Maybe we’re all off balanced a little and we like that reflected in what we do. I dunno..that’s just my guess.

Floating Candles

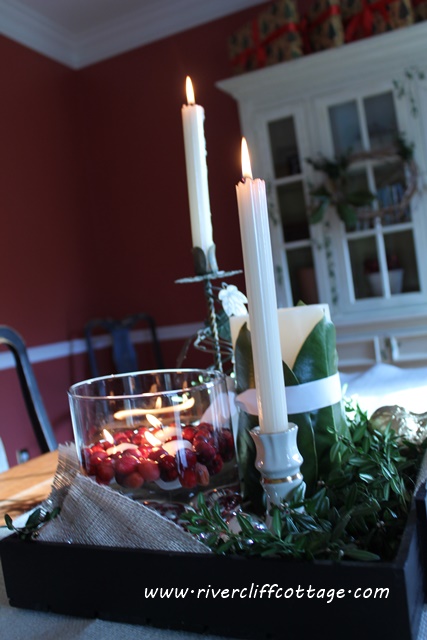
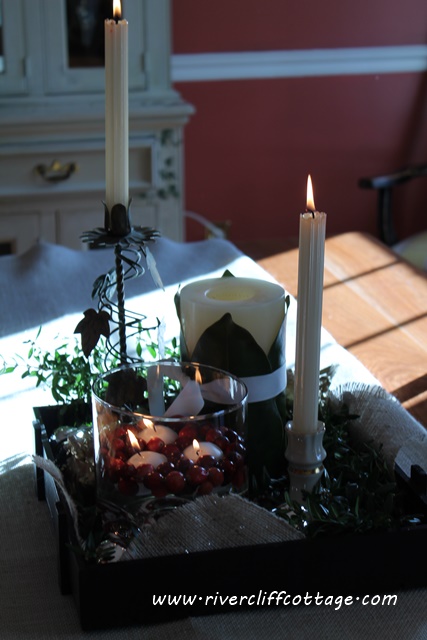
It still looks a little plain, doesn’t it? It’s time to nestle it in with some greenery. I had a small crate that had been used to ship fruit which I spray painted black. I added some boxwood stems and three other candles that I already had.

Inexpensive Table Centerpiece

Here’s another picture…all very natural. I had a few of the shiny balls left so I tucked them in with a couple of gourds that left over from fall. The gourds been spray painted gold and are still workin’ hard here in Mendota, Virginia! You can see a little bit of them in the picture. I started to draw an arrow, but you get it!

Natural Christmas Table Centerpiece

I hope you liked my centerpiece which was obviously a low-budget, low-talent piece. Easy as Pie. Cheap as Dirt. .

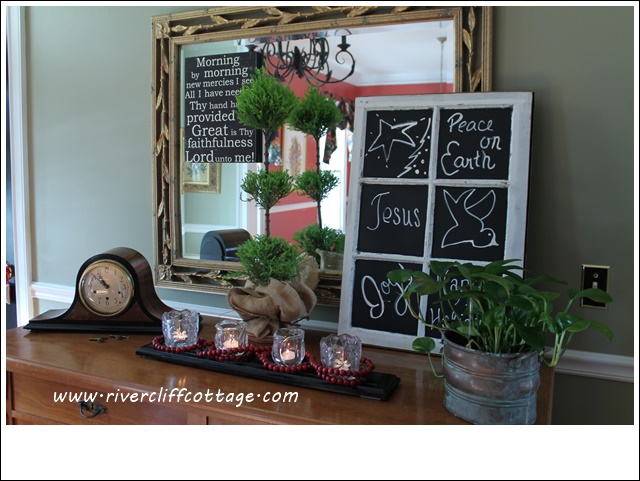
Here’s the foyer which opens up to the dining room. I am not even looking at decorations in Blogland this year. They are way too fabulous and fancy, and I don’t know where anyone keeps all that stuff after Christmas is over. I’m too lazy.

Christmas Foyer Display

Thank you for reading RiverCliff Cottage.

Loading

We’re Rollin’ for Christmas!

I am almost finished decorating the family room for Christmas…sans tree.  We do not put a tree up until the eve of Christmas Eve.    We like a “live” tree, and I don’t want to worry about a tree drying out.    But still..I don’t wanna wait until that close to Christmas to have that Chrismas-y feel!  Here’s where that pretty tree will go when it DOES arrive…right in this corner.   I can just see it…smell it!

Mendota Burley Tobacco Basket

This is a comfortable room. It used to be a garage, and we turned it into a den to try and keep the doggies out of the house for at least a portion of the time. It worked until they became too feeble to climb steps. 🙁

Den With Christmas

Do you see the little wooden truck on the hearth? This post is about that little truck and what it’s hauling. It’s full of gourds. While putting the garland up on the front porch…I thought “what the heck am I going to do with the gourds?” Last year, I had loads of them–perfectly round– and I spray painted them gold and piled them everywhere. This year, however, I just have a few gourds…all of them looking like large pears. Here they are in their fall clothing…before they got all fancy for Christmas.   They were really into fall…they even wore a monogram.

Blocks and Gourds

And they were hanging around on the porch…that’s where I found them today.

Fall Grape Cart LP With Sam

Begging not to be thrown away, they asked about a spray tan. “What?” “Yes…a spray tan…we want a spray tan like the gourds got last year!” I then realized they were talking about being spray painted gold. “Oh…sure,” I replied..”why not?”    And here they are!

Spray Painting Gourds for Christmas

And now they are ready to roll with their new look. I don’t think I can trust these flashy gourds. They’ve went out and got “lit.”

Flaming Gourds

And do you know what I hear when walk by this little truck? They giggle and say “Merry Christmas!” Really!

Loading

Wreath Rings From Preserved Boxwood

I’m still decorating around the house using natural items and what I’ve got on hand. We live in a rural area, and there is plenty of greenery available.

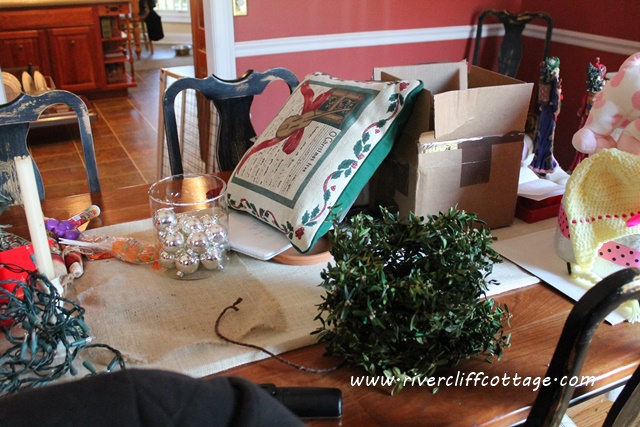
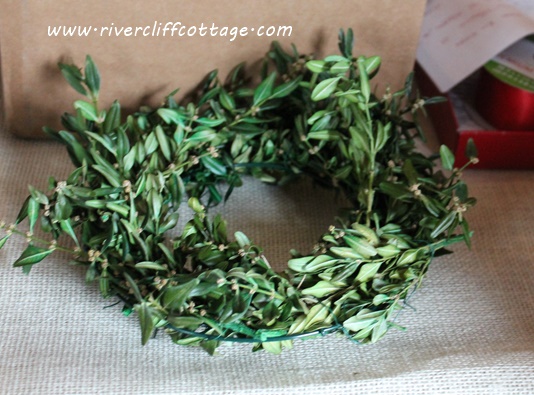
I have enjoying using the preserved boxwood made last month. I don’t have to worry about it drying out. Here’s one of the wreath rings. I ran a wire through the ring and gathered the burlap fabric that is pretending to be a table runner.

Wreath on Table Runner

My wrists are hurting from twisting and turning greenery on wreaths. In year’s past, I’ve had a wreath making party and I’ll definitely do that next year. For the wreath making party, all the greenery comes here. With my making the wreaths by myself, I have to go hunting for the greenery!

Loading

Wreaths for the Inside

I bought four wreaths at my True Love’s this morning. They were $10 each. I got them home and they were so dry–I am returning two of them. The two I’m returning were going inside my house. No way — that would be asking for a mess all of the time. Sorry True Love–I’ll be giving you your wreaths back and wanting my $20 back. I can make my own, and they’ll be fresh.

I like the mixture of greenery in wreaths. I just drove around and clipped things from my neighbors’ trees.

Wreath 1

After I took this picture, I submerged the wreaths in water. I’m letting them dry out now and tomorrow, they’ll go on the door. I’ll take a picture.

Loading

NOEL on the Mantle

I’ve been off of here a few days. It’s good to be back. I’ve missed you!

On the Wednesday before Thanksgiving at mid-afternoon, we had a BIG SURPRISE which surrounded identify theft. Without dragging you along on all the details, we temporarily found ourselves with no money via ATM or credit card for the upcoming Thanksgiving holiday. Nada. It’s unweaving and being “fixed” now but it was a wake up call.

I think in the long run, it’s a good thing because Mike will finally get involved in our household budget.

So…I’m decorating the house for Christmas on a budget. I’d planned on going down to Hobby Lobby and copying this “Noel” which I found on Pinterest from Once.Daily.Chic

However, rethinking my newly non-existent budget, I went in a slightly different direction shopping our house, the woodshop, etc.   Lo and behold, I had an “E”.  The rest is the preserved boxwood wreath (read How to Preserve Boxwood in 20 Days here) I made last week and a couple of pieces of wood.

Do you like it?

Loading

Eatable Decor

It’s cold and sunny in Mendota, Virginia today.   I have been cleaning house and enjoying being inside where it’s warm.  We have snow in the forecast for next week.  If it occurs, it will be a snag in our Thanksgiving plans for sure!  Can’t worry about what might or might not happen.

If it does snow, however, I usually am okay–more than okay– with groceries. I keep two of all the essential grocery items. Haven’t ran out of milk in over 10 years!! I organize my pantry so I can find things, and I always have some “basics” right out in the open. Like above my cabinets…colorful and useful and sparkling clean. I just cleaned each jar so I know this to be true! 

Jars on Top 1

And the other direction..more jars. I have them all around my kitchen cabinet tops. I went in a friend’s house about 14 years ago, and she had green beans on her cabinet tops. Her name is Amy, and I’ve been copying Amy ever since. Sometimes there are more tomatoes than green beans. It depends on how much I’ve canned and how much I’ve used. I once asked someone “did you notice my green beans on the cabinet top?” The person sneered and said “talked about it all the way home.” Did you know that I didn’t get it? I thought she really liked them (how could she not?) and talked about them all the way home Ha! I’m serious!

Jars on Top 2

Above the plates…it’s a little sparse in this picture. I usually have several jars of pistachios as they are our special nephew’s favorite. That is Neth, and he can put away the pistachios!

Shelf Above Plates

I like red and yellow in the kitchen. No matter how hard I try, I cannot get a picture of the plates on the wall that looks  good. I enjoy looking at them every time I walk in the room..and frankly I want to show them off. Never quite looks right. There is always a shadow. The shelves are a place where I keep pasta. I need to refill these jars.

Plates

I’m watching more Lifetime Christmas movies tonight with my Dear Girl beside me. Currently watching Country Christmas with Dolly Parton. I know it’s not cool, but I love Dolly Parton.

Yep…love these plates.

Plates 2

Loading

How to Preserve Boxwood in Twenty Days

Fresh wreaths are the best ones but they dry out!! I’m going to have some guests in early December,  and I want to have wreaths up.  I decided to try preserving boxwood and making wreaths that, hopefully, will last until Christmas and perhaps be stored for next year.  I visited a lot of bloggers and asked questions, but ultimately, everyone had a slightly different approach on how to preserve boxwood.  I ended up talking with a local floral supply store and followed their insructions.    Here’s the end result..

Wreath on Chair 2

This process takes more time and patience than supplies. However you will need 20 days and the following for two jars of the mixture .  I doubled what is listed below and made enough for four Mason jars — each with about 3-4 inches of liquid in the jar.

  • One cup Glycerin (I found mine in the soap making area of Hobby Lobby). $4
  • Two tablespoons Absorbit Floral Dye – Holiday Green (floral supply store). $9
  • One tablespoon absorbic acid (if you are a home canner, you’ll already have this)
  • One and one-half cups hot water
  • Wire wreaths
  • Floral wire
  • Boxwood clippings
  • Gloves
  • Spoon to mix the above
  • Two Mason jars

Boxwood Lineup


Day One

Start by taking boxwood cuttings about 8 inches in length.

Boxwood

Prepare your mixture of glycerin, dye and hot water. I used Mason jars for this project.    Stir your dye and hot water until it is blended, and then add the glycerin and absorbic acid.

The Absorbit Floral Dye is not green in its dry form. It looks like chili powder.

Dye


Don’t be mislead.  This is a bright green dye.  Wear gloves or you’ll look like the Jolly Green Giant.

Green Dye

Trim the lower branches of your boxwood, snip the end of the stem one more time and immediately place in the mixture in the jar and mixture.     If possible, work outside because of the dye.

Jars

All the stems are sitting in the preservation liquid in the picture below   These actually look pretty, but there is no way I’d leave them sitting out. The disaster potential is just too high with all this bright green dye. I hid them in a far away corner of the garage. Here’s one completed jar ready to be carefully walked to its hiding spot.

Jar ready to go

Day 10

By this time, your cuttings are ready to start drying.   When removing the cuttings from the jars, it’s best to do this outside allowing excess dye to drain off the stems.   Here’s a few of mine just lying on the grass.  Note the bright, holiday green stems:

Cuttings AFter

Following this step, place the cuttings on newspaper on top of plastic and allow them to dry for ten days.   I did this in my garage floor in an out-of-the-way corner, and I checked on them once during the 10-day period.     They were still there….still green!   Interesting side effect, you’ll now have some green jars.

Green Jars

If this green does not wash off, I’m going to place white carnations in the jars for Christmas.

Day 20

You are ready to make your wreath(s). All that is required now is your wreath form, floral wire and your talent and patience in tucking and wiring the branches.

Wreath and Wire

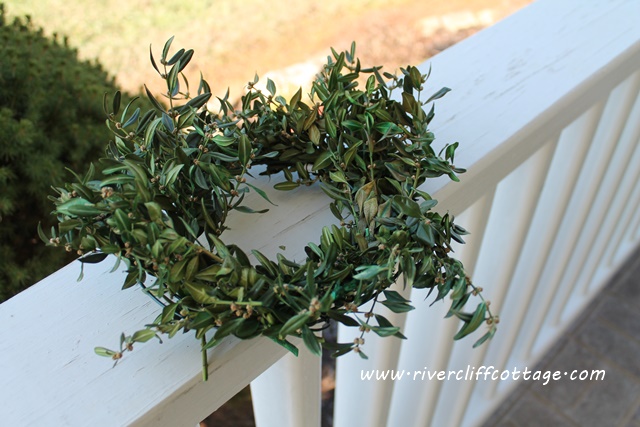
I have a few stems still sticking out, but I like the casual look of the wreath. It does not look like it was made in a “production” environment.   My two little wreaths will go on the back of barstools in the kitchen.   A few pictures of my first completed wreath. I took these outside because the light is so much better.   Check out that sweet little nose in the right hand side of the picture.  She helped me.

Wreath on Chair


Here’s another…I’m not even sure if I’ll add a bow but I will tidy it up a little bit…I see a green stem sticking out.

Wreath on Chair Cropped

From my four jars, I have enough to make two wreaths like this with a small amount of boxwood left over.   The plants did not absorb all of the liquid so I started four more jars of cuttings.   I plan to make one larger wreath from this batch.

Thank you for reading RiverCliff Cottage.      Roslyn Beaule


Loading

Mini Quilt Retreat Day Two

We finished up Day Two yesterday of our Mini Quilt Retreat. I don’t have a lot of pictures, and I don’t have a picture of my quilt. I’ll post it in about a week when I get it back out. I was so tired that I shoved my sewing machine and the accompanying “stuff” that goes along with quilt making in the bedroom and shut the door.

My poor quilt. It’s a sad little thing because all of it’s seams are every which way. They should all be a certain way but I got mixed up, and I then decided that completing the quilt was a better goal than seam ripping. Here I am…I pulled my hood up because I felt so guilty. The Uni-Quilter.

Uniquilter I

I was so tired I didn’t take many pictures at the end of the day. Here’s one on the ironing board. If you don’t like to iron, quilting may not be for you. Isn’t that IRONIC? Get it…funny. This was Erin’s quilt…it turned out really pretty. All her seams did what they should.

Erin's Quilt

Here’s another quilt and quilter!

Tineke's quilt

More later…I’m watching Lifetime Christmas movies the remainder of the weekend

Loading

Mini Quilt Retreat Day One

There is so much talent in them thar hills!

My friend and neighbor Chris has grace, kindness, beauty and talent. She is not only a great quilter, she is an experienced and gifted instructor. Today I learned that she taught in a fairly large quilt retreat for about 14 years. I’m feel so lucky that she’s teaching a few friends and me. Today we had a mini quilt retreat. Our group was small…just five of us plus Chris, and since my house has a finished and heated garage, we set up our sewing machines and tables there and got at it!

The first part of this was cutting the fabric. We cut all of our fabric into 2″ strips…

Quilt Fabric Teneca

We then sewed the strips together and cut them again into 5″ rectangles. So much progress was made! Here’s Tineke’s fabric once the rectangles were created and positioned…

Quilt Tenica

Erin’s fabric…

Erin Quilt

Margie’s fabric…

Margie QuiltNancy’s fabric…

I didn’t get to take a picture of it laid out in “quilt form”..I’ll have that tomorrow. Here’s Nancy’s fabric..

Quilt Fabric Nancy

Oh..and here’s mine! Mine is a baby’s quilt, and if it turns out decently, I will be donating it.

Quilt Eva

A very productive Day One. Whew! This is hard work! Come back tomorrow and see what we accomplish!

Loading

Visions In My Head

And visions of little quilts all dancing in my head tonight. Tomorrow is the first day of our Mendota Mini Quilt Retreat hosted by Chris and me!

Do you know how many quilts I’ve started? Do you know how many quilts I’ve finished?

Quilt 3

I’ll post what we’ve got accomplished tomorrow night. I’m always optimistic.

Loading