
I talked about our goals with our kitchen renovation in a prior post you may read here. This post is solely on modifications we are making to our existing Kraftmaid semi-custom cabinetry to give them an updated look and make them more functional. I searched the internet for something like this and could not find it, so I’m hoping others find this and learn from what we did right or wrong.
Our kitchen cabinet update is based on reusing and modifying our existing semi-custom Kraftmaid cabinetry. Once finished, there will be three colors of cabinetry — one will be the current natural cherry; one will be a creamy Sherwin Williams color called Vanillin; and the remaining is a Valspar green color called Leafy Rise. This process is not a simple cabinet reface. In fact, we are not refacing any of the cabinets. For this to be successful, we had to find a custom cabinet maker willing to work on a small job. In Bristol, Virginia, this person for us was Tom Harmon. He has been awesome to work with, and if you are reading this locally, message me and I’ll provide his contact information.
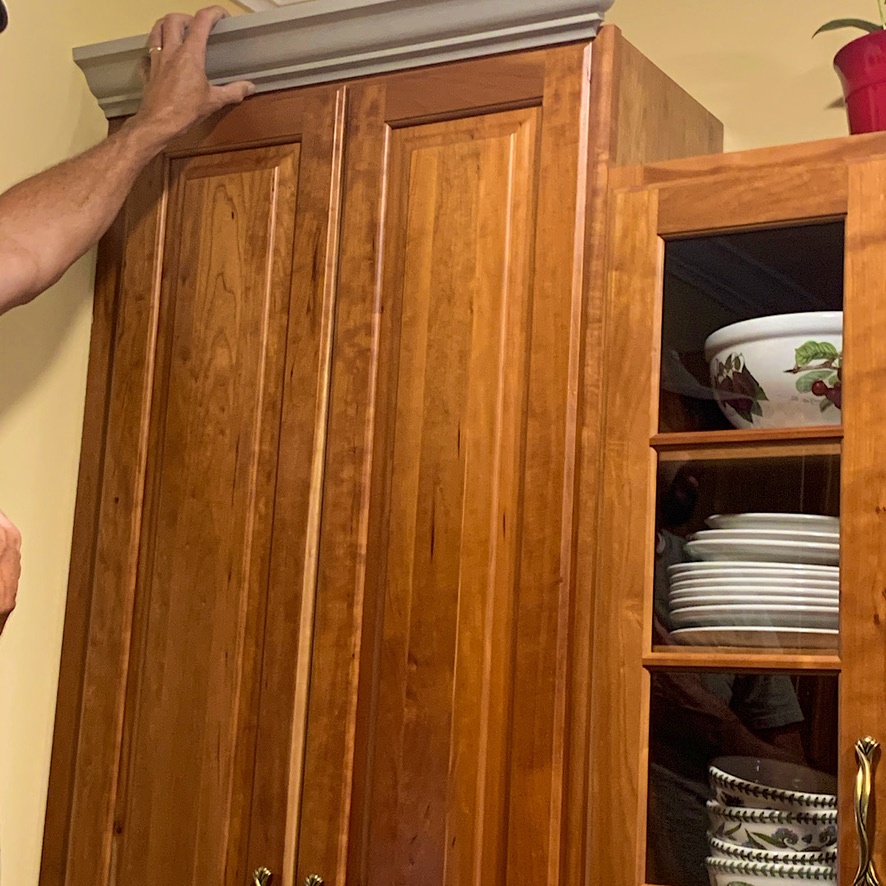
My cabinets had galley rail which dated them. We are replacing the galley rail with crown moulding. The cabinets are varying heights and it’s tricky to get crown on all of the cabinets and still be able to open all of the doors. This is where the skill of an experienced cabinet maker is working in our favor. The crown is not yet installed so I don’t yet have pictures.
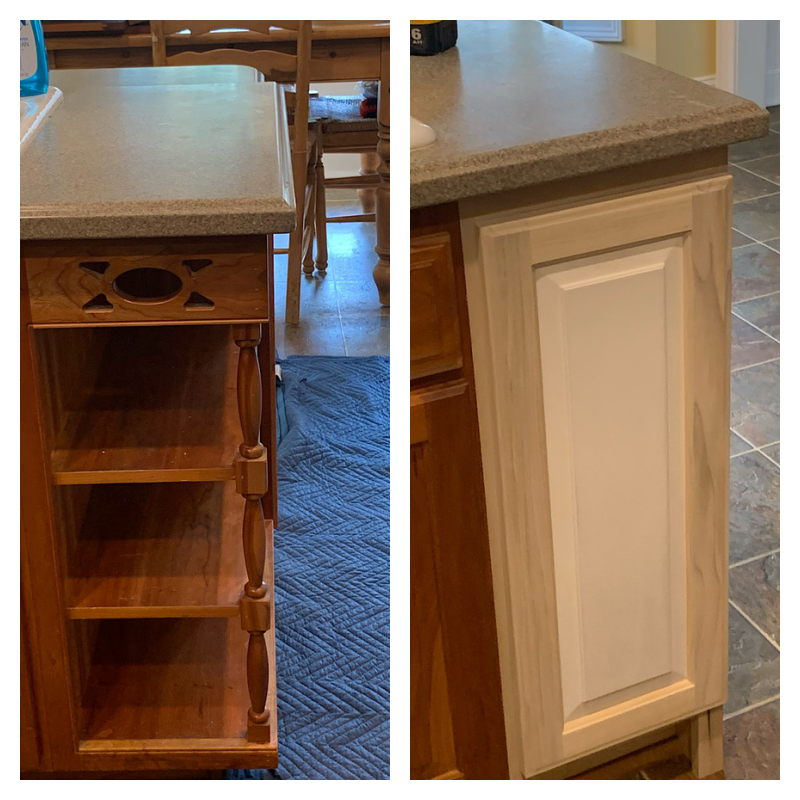
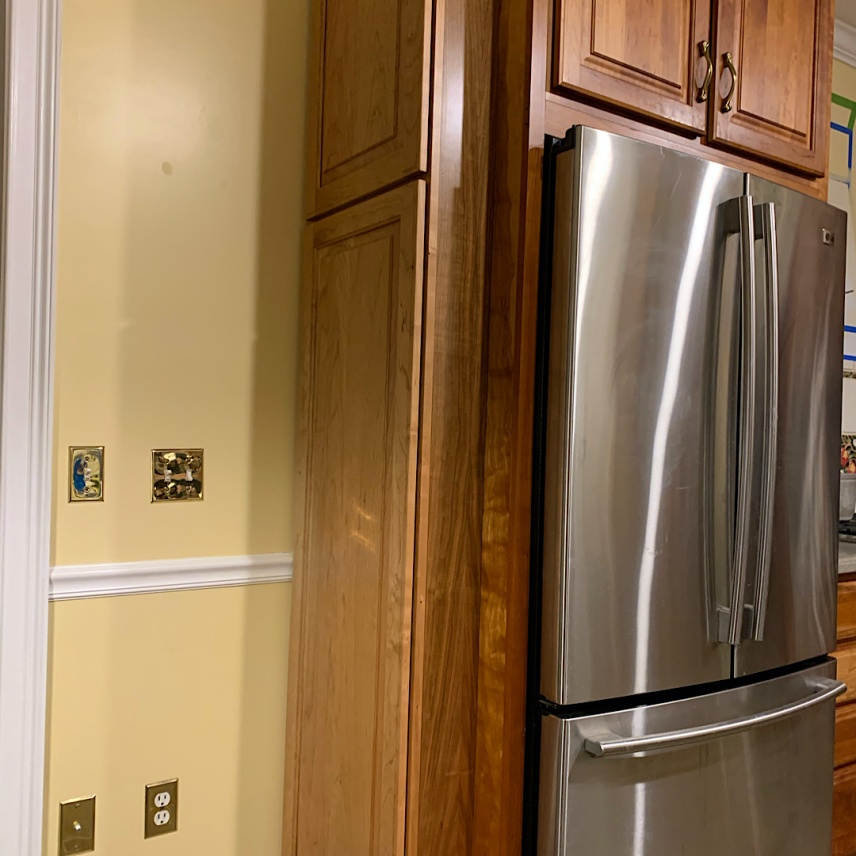
In the photograph below, the left side shows small shelves that were too shallow to be useful and they were a trap for dust and fur. On the right side of the photograph, Tom has enclosed that area and made a door which matches the other lower cabinet doors once painted. Had we opted to buy a Kraftmaid door, it would have been a special order and the shipping would have been exorbitant. I was told you must order at least five “pieces” of Kraftmaid to get a break on the shipping. Tom had the talent and equipment to match the doors, and it was more cost effective for him to make a custom door.
Next, 20 years ago we “created” a small shelf at the end of our upper cabinets. It was going to be “styled” and look nice but it became a repository of Mike’s wallet, receipts and basic junk. Worse yet, what didn’t fit in the shelves got stacked below on the kitchen counter. It was a source of contention that the cabinet was always cluttered. I’m not exactly a neat person, but this was something that really bothered me.
So, the solution was to provide him with a place where he could stash his things yet I would not have to look at them. So the shelves below were removed…
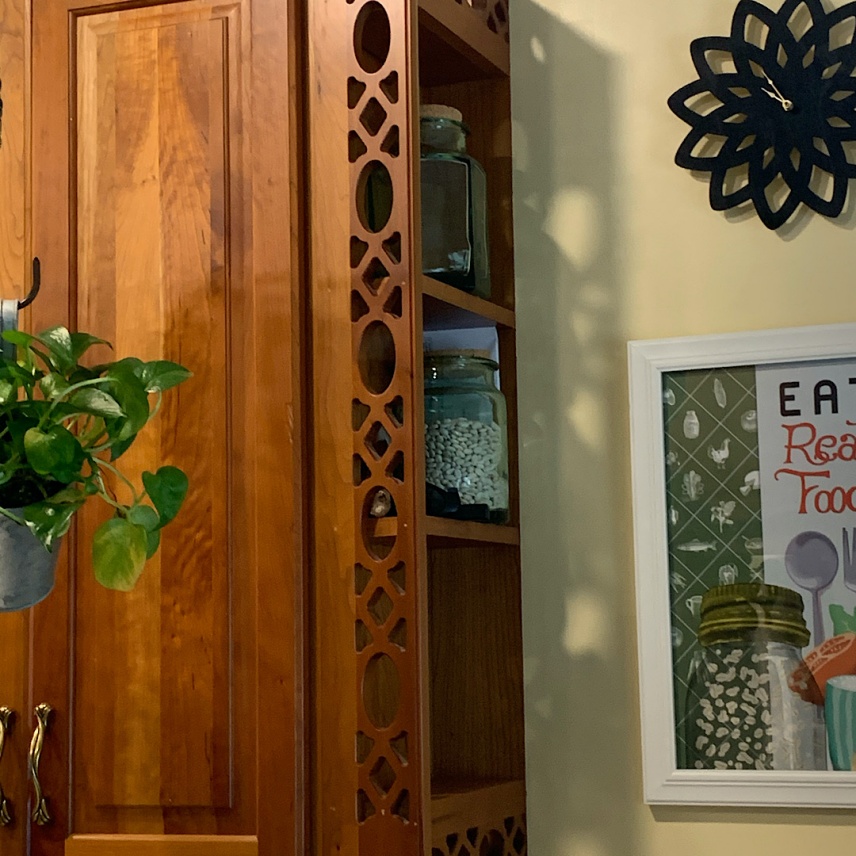
And in place of those shelves, an enclosed end-cap cabinet was installed.
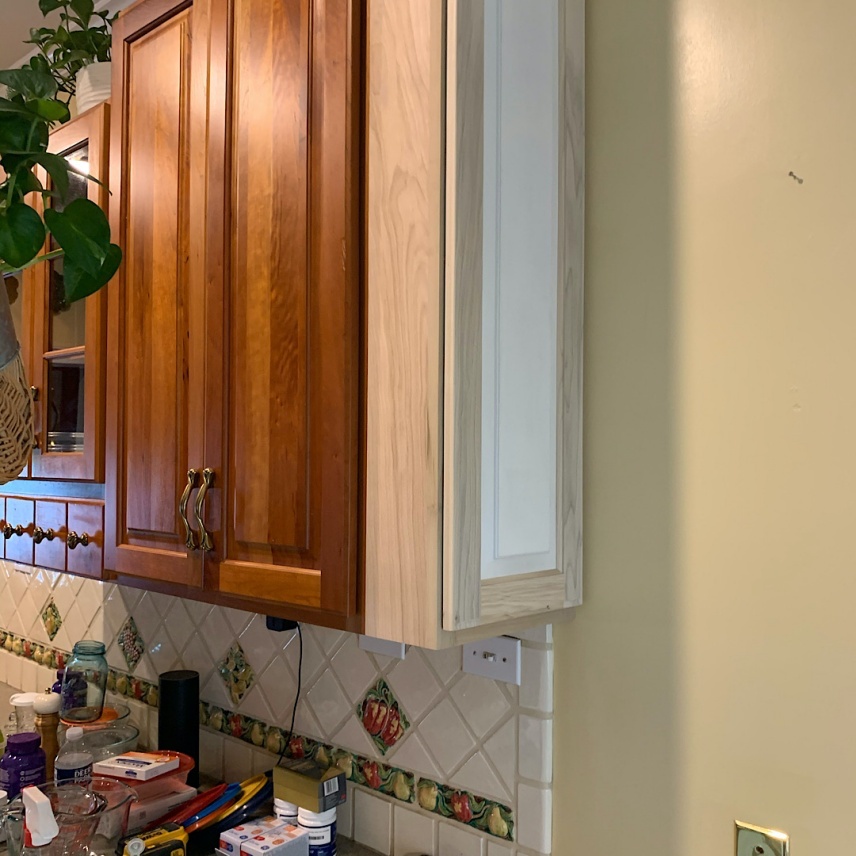
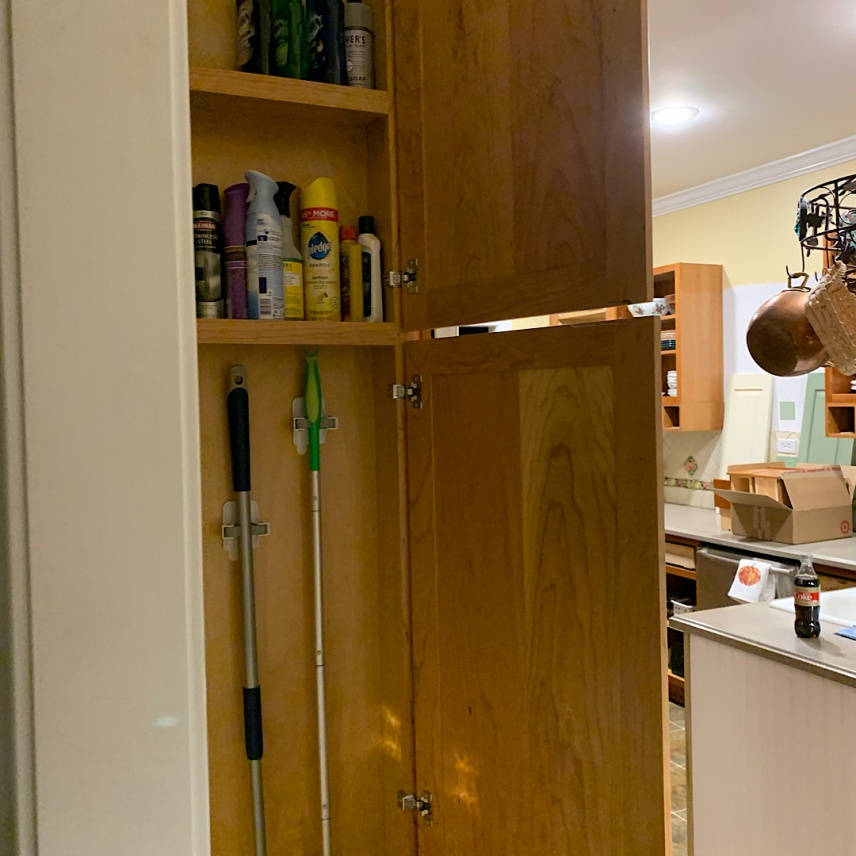
So… as shown in the photograph below, when you open that end cap cabinet door which will be painted to match the upper cabinets, you’ll see a place for all that clutter. (The door has been removed for painting in this photograph.). There’s a lot of stuff on the cabinet in this picture and I’m not certain why. I must have had to empty a cabinet for some reason while this work was going on.

I also wanted to provide a place to hang the Swiffer mop and the Bona mop. Tom found a close match to the existing Kraftmaid cherry wood cabinetry (this section is not being painted) and build it as an end cabinet add on. It is slightly lighter than my existing natural cherry, but this will change over time. This is photographed below.
And here is is open. I really like it. Sorry for the bad photos.
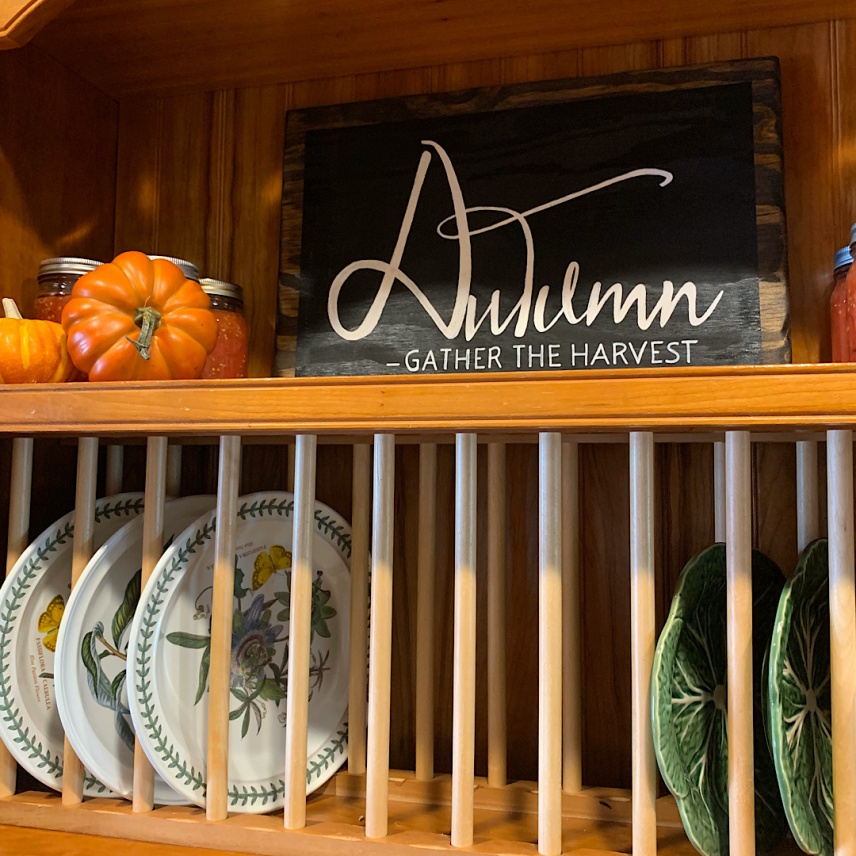
In the photograph below, you’ll see a plate rack. I’ve enjoyed that plate rack, and I still like it, but I want my kitchen to feel more open, so I removed it and in it’s place there will be open shelving.
And finally, the picture below shows my range hood. Replacing the range hood did not start out as part of the update plan.
However, we needed a new fan/light/vent kit. Here’s a shameful truth. I did not know how to pull this out and clean it. It had not been deep cleaned in 20 years. Honestly, it had not been cleaned in 20 years. Seriously. There will be a new one installed which I am going to read the cleaning instructions on as soon as it’s operational; and since we are doing that, Mike is building me a new range hood. This was a surprise! My inspiration was this.
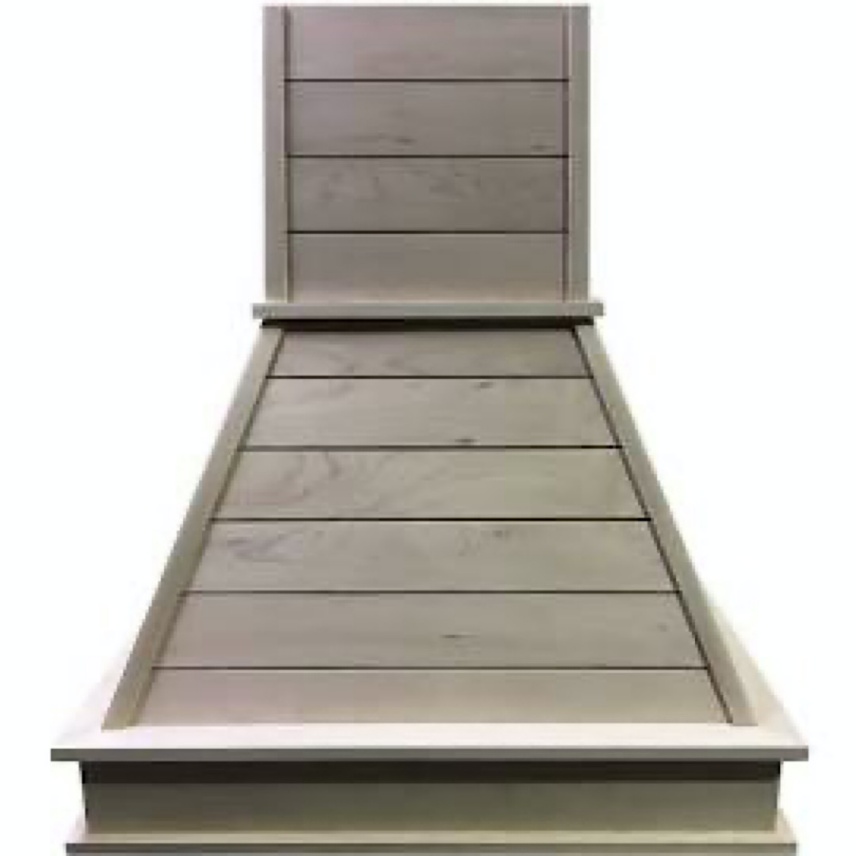
These custom range hoods run between $800-$1500 on ETSY. By Mike doing it himself, it will save us money, and it was such a nice gesture on his part. It will also be an opportunity to bring some paint over to an area of cabinetry that I was not painting. I need to “move the color” around the room a little bit and this is a good opportunity.
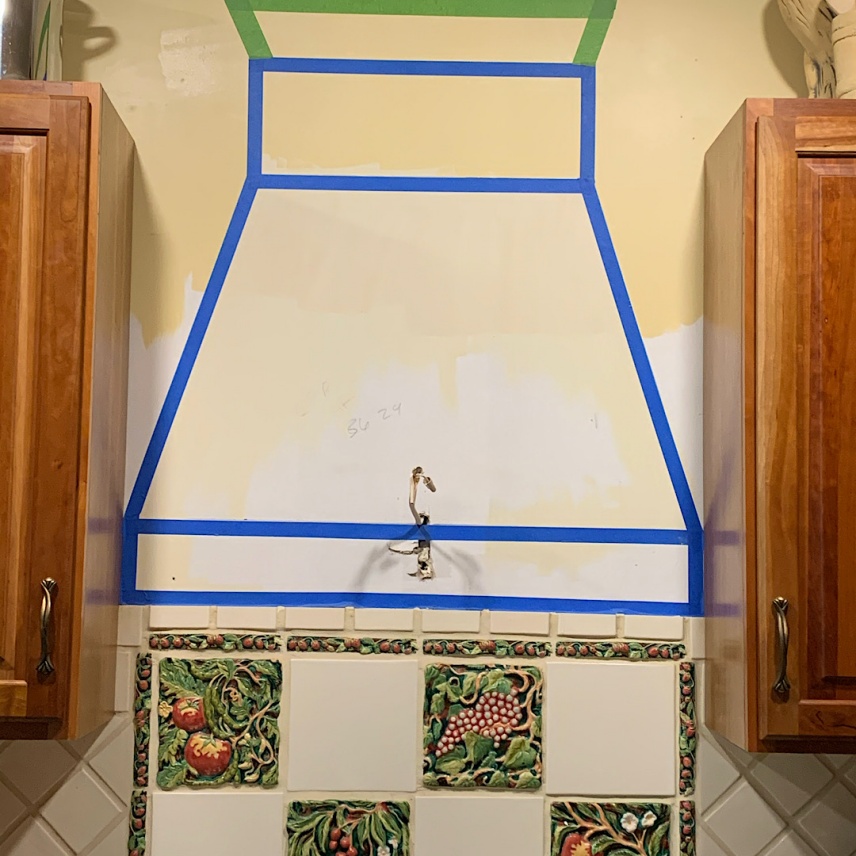
For scale and to ensure we were on the same page — when you’re husband makes you something you don’t want to look up and say “hmmm…don’t really like that!” … we drew and taped what I wanted so that Mike was sure he understood. This will be made of shiplap.
These are all of the modifications we have made to the kitchen cabinetry.
Next up is painting these cabinets prior to the installation of the quartz countertops. Paint will be my next post. We’ve learned a lot about painting cabinets and while it is not expensive compared to new cabinetry, it still was a significant cost.
![]()